To show only post titles in archive and homepage

Friday, January 01, 2010


To show specific number of posts in label pages is already posted. If your blog has much content and if not possible to manage, then here a hack. This helps to show only post titles in label, archive and homepage.

To get this hack just follow the instructions below :
  • Login to Blogger
  • Go to > Layout > Edit HTML and select 'Expand Widget Templates'
  • Now follow the below steps carefully.
To show post titles in homepage only
If you want to show post titles in homepage only the search for <b:include data='post' name='post'/> and replace it with this code :
<b:if cond='data:blog.url == data:blog.homepageUrl'>
<h3><a expr:href='data:post.url'><data:post.title/></a></h3>
<b:else/>
<b:include data='post' name='post'/>
</b:if>
To show post titles in labels page only
If you want to show post titles in labels page only the search for <b:include data='post' name='post'/> and replace it with this code :
<b:if cond='data:blog.pageType == &quot;item&quot;'>
<h3><a expr:href='data:post.url'><data:post.title/></a></h3>
<b:else/>
<b:include data='post' name='post'/>
</b:if>
To show post titles in archive page only
If you want to show post titles in archive only the search for <b:include data='post' name='post'/> and replace it with this code :
<b:if cond='data:blog.pageType == &quot;archive&quot;'>
<h3><a expr:href='data:post.url'><data:post.title/></a></h3>
<b:else/>
<b:include data='post' name='post'/>
</b:if>
If you face any problems or the hack does not work properly please do post comments.

To show specific number of posts in label pages

Wednesday, December 23, 2009


When you click on any label in your blog the page displays 20 posts by default. If you want to change the number of posts to be displayed based on your template here is a hack.

To add this to your blog just follow these steps
  • Login to Blogger
  • Go to > Layout > Edit HTML and select 'Expand Widget Templates'
  • Now find(CTRL + F) this code :
<a expr:dir='data:blog.languageDirection' expr:href='data:label.url'>
<data:label.name/>
</a>
</b:if>
<span dir='ltr'>(<data:label.count/>)</span>
  • Now replace this code with below code.
<a expr:dir='data:blog.languageDirection' expr:href='data:label.url &quot;?max-results=5&quot;'>
<data:label.name/>
</a>
</b:if>
<span dir='ltr'>(<data:label.count/>)</span>

 Change the value of code in red to your required value. This works well for any template.
 If you are using 'Label Cloud' don't use this.

Auto hide social bookmark gadget for blogger

Tuesday, December 22, 2009


How to add 'social bookmark icons' below each post is already posted. Here is another gadget for social bookmark icons, in which all icons are partially hidden and when moves hovers them the icons are visible.

Here is the demo :

To add this gadget to your blog just follow these simple steps :


Step 1 :
  • Login to Blogger
  • Go to > Layout > Edit HTML and select 'Expand Widget Templates'
  • Now find(CTRL + F) </head>
  • And immediately above it, paste this code :
Step 2 :
<!--Autohide Bookmarks Starts-->
<style type='text/css'>
div.beauty-bookmarks {
height:54px;
background:url('http://i43.tinypic.com/2ueii3t.png') no-repeat left bottom;
position:relative;
width:540px;
}
div.beauty-bookmarks span.beauty-rightside {
width:17px;
height:54px;
background:url('http://i43.tinypic.com/2ueii3t.png') no-repeat right bottom;
position:absolute;
right:-17px;
}

div.beauty-bookmarks ul.socials {
margin:0 !important;
padding:0 !important;
position:absolute;
bottom:0;
left:10px;
}
div.beauty-bookmarks ul.socials li {
display:inline-block !important;
float:left !important;
list-style-type:none !important;
margin:0 !important;
height:29px !important;
width:48px !important;
cursor:pointer !important;
padding:0 !important;
}
div.beauty-bookmarks ul.socials a {
display:block !important;
width:48px !important;
height:29px !important;
font-size:0 !important;
color:transparent !important;
}
.beauty-furl, .beauty-furl:hover, .beauty-digg, .beauty-digg:hover, .beauty-reddit, .beauty-reddit:hover, .beauty-stumble, .beauty-stumble:hover, .beauty-delicious, .beauty-delicious:hover, .beauty-yahoo, .beauty-yahoo:hover, .beauty-blinklist, .beauty-blinklist:hover, .beauty-technorati, .beauty-technorati:hover, .beauty-facebook, .beauty-facebook:hover, .beauty-twitter, .beauty-twitter:hover, .beauty-myspace, .beauty-myspace:hover, .beauty-mixx, .beauty-mixx:hover, .beauty-script-style, .beauty-script-style:hover, .beauty-designfloat, .beauty-designfloat:hover, .beauty-syndicate, .beauty-syndicate:hover, .beauty-email, .beauty-email:hover {
background:url('http://i44.tinypic.com/1znbj83.png') no-repeat !important;
}
.beauty-furl {
background-position:-300px top !important;
}
.beauty-furl:hover {
background-position:-300px bottom !important;
}
.beauty-digg {
background-position:-500px top !important;
}
.beauty-digg:hover {
background-position:-500px bottom !important;
}
.beauty-reddit {
background-position:-100px top !important;
}
.beauty-reddit:hover {
background-position:-100px bottom !important;
}
.beauty-stumble {
background-position:-50px top !important;
}
.beauty-stumble:hover {
background-position:-50px bottom !important;
}
.beauty-delicious {
background-position:left top !important;
}
.beauty-delicious:hover {
background-position:left bottom !important;
}
.beauty-yahoo {
background-position:-650px top !important;
}
.beauty-yahoo:hover {
background-position:-650px bottom !important;
}
.beauty-blinklist {
background-position:-600px top !important;
}
.beauty-blinklist:hover {
background-position:-600px bottom !important;
}
.beauty-technorati {
background-position:-700px top !important;
}
.beauty-technorati:hover {
background-position:-700px bottom !important;
}
.beauty-myspace {
background-position:-200px top !important;
}
.beauty-myspace:hover {
background-position:-200px bottom !important;
}
.beauty-twitter {
background-position:-350px top !important;
}
.beauty-twitter:hover {
background-position:-350px bottom !important;
}
.beauty-facebook {
background-position:-450px top !important;
}
.beauty-facebook:hover {
background-position:-450px bottom !important;
}
.beauty-mixx {
background-position:-250px top !important;
}
.beauty-mixx:hover {
background-position:-250px bottom !important;
}
.beauty-script-style {
background-position:-400px top !important;
}
.beauty-script-style:hover {
background-position:-400px bottom !important;
}
.beauty-designfloat {
background-position:-550px top !important;
}
.beauty-designfloat:hover {
background-position:-550px bottom !important;
}
.beauty-syndicate {
background-position:-150px top !important;
}
.beauty-syndicate:hover {
background-position:-150px bottom !important;
}
.beauty-email {
background-position:-753px top !important;
}
.beauty-email:hover {
background-position:-753px bottom !important;
}

</style>
<!--Autohide Bookmarks Ends bloggerflick.blogspot.com-->
You also change the URL in red to your own image link.

Step 3:
Now find this tag <data:post.body/> and after that, paste this code:
<b:if cond='data:blog.pageType == "item"'>
<div class='beauty-bookmarks'>
<ul class='socials'>
<li class='beauty-delicious'><a expr:href='&quot;http://del.icio.us/post?url=&quot; data:post.url &quot;&amp;title=&quot; data:post.title' target='_blank'/></li>
<li class='beauty-digg'><a expr:href='&quot; http://digg.com/submit?url=&quot; data:post.url &quot;&amp;title=&quot; data:post.title' target='_blank'/></li>
<li class='beauty-technorati'><a expr:href='&quot; http://technorati.com/faves?add=&quot; data:post.url &quot;&amp;title=&quot; data:post.title' target='_blank'/></li>
<li class='beauty-reddit'><a expr:href='&quot; http://www.reddit.com/submit?url=&quot; data:post.url &quot;&amp;title=&quot; data:post.title' target='_blank'/></li>
<li class='beauty-stumble'><a expr:href='&quot; http://www.stumbleupon.com/submit?url=&quot; data:post.url &quot;&amp;title=&quot; data:post.title' target='_blank'/></li>
<li class='beauty-designfloat'><a expr:href='&quot;http://www.designfloat.com/submit.php?url=&quot; data:post.url &quot;&amp;title=&quot; data:post.title' target='_blank'/></li>
<li class='beauty-facebook'><a expr:href='&quot; http://www.facebook.com/sharer.php?u=&quot; data:post.url &quot;&amp;title=&quot; data:post.title' target='_blank'/></li>
<li class='beauty-twitter'><a expr:href='&quot; http://twitthis.com/twit?url=&quot; data:post.url &quot;&amp;title=&quot; data:post.title' target='_blank'/></li>
<li class='beauty-furl'><a expr:href='&quot; http://www.furl.net/storeIt.jsp?u=&quot; data:post.url &quot;&amp;title=&quot; data:post.title' target='_blank'/></li>
<li class='beauty-syndicate'><a href='http://feeds.feedburner.com/bloggerflick' title='Subscribe to RSS'/></li>
<li class='beauty-email'><a expr:href='&quot; mailto:?subject=&quot; data:post.url &quot;&amp;title=&quot; data:post.title' target='_blank'/></li>
</ul>
<span class='beauty-rightside'/></div>
</b:if>
Change the link in red to your blog feed URL.

Now, save your template. If you face any problems just post a comment.

To remove 'showing posts with label' in blogger

Monday, December 21, 2009


When you click on any label you can see a status message 'showing posts with label <>' and if your are planning to remove it here is a simple hack.

To add this hack just go to > Layout > Edit HTML and search for :
<b:includable id='status-message'>
<b:if cond='data:navMessage'>
<div class='status-msg-wrap'>
<div class='status-msg-body'>
<data:navMessage/>
</div>
<div class='status-msg-border'>
<div class='status-msg-bg'>
<div class='status-msg-hidden'><data:navMessage/>
</div>
</div>
</div>
</div>
<div style='clear: both;'/>
</b:if>
</b:includable>
Remove the code in red, which leaves out
<b:includable id='status-message'>
<b:if cond='data:navMessage'>
<div>
</div>
<div style='clear: both;'/>
</b:if>
</b:includable>
Now save your template. Confused ? Just post a comment.

Orkut Share Button without Javascript

Monday, December 21, 2009


Previous tutorial How to add 'Orkut Share' button to every post requires javascript to work. Here is an updated version of the share button which do not require any script. Simply, add this code to your template and this enables to share every post on orkut.

Updated version of orkut code :
 
To add this Orkut share button go to > Layout > Edit HTML and search for <div class='post-header-line-1'/> by using Ctrl + F and add the code above this tag.
<b:if cond='data:blog.pageType == &quot;item&quot;'>
<a expr:href='&quot;http://promote.orkut.com/preview?nt=orkut.com&amp;du=&quot;   data:post.url   &quot;&amp;tt=&quot;   data:post.title' target='_blank'><img src='http://code.google.com/apis/orkut/docs/images/share.gif'/></a></b:if>
 Now save your template.  If you face any difficulties please do post comments.

To hide navbar from blogger layout

Sunday, December 20, 2009


If you are using a default blogger template then it displays navbar at the top of the page. To remove this navbar here is a simple hack.

Here is the navbar with many options :


To add this just go to > Layout > Edit HTML and search for #navbar-iframe and replace it with below code :
#navbar-iframe {
display: none !important;
}
This will hide the navbar from blogger template. Faced any problems please do post comments.

To display codes [CSS, XML, HTML and Javascript] in posts

Saturday, December 19, 2009


Many of bloggers are not aware of displaying codes [CSS, XML, HTML and Javascript] in blogger posts. If anyone tries to post normally the code is not visible. The code to be posted should be friendly.

It can be customized in two methods
  • Elliotswan Postable
  • Firefox Addon
Elliotswan Postable
The code to be posted can be made friendly at Elliotswan.com. Just open the site, post the code and click on make it friendly. Make Code Post Friendly : http://www.elliotswan.com/postable/

Firefox Addon
Install GreaseMonkey https://addons.mozilla.org/en-US/firefox/addon/748
and open this script http://userscripts.org/scripts/source/42696.user.js.

Install the script and you will find "HTML Encode Selection" button by the side of "Publish Now" button in post editor. Now, to make any code postable select the entire code in "Edit HTML" mode and click on "HTML Encode Selection". The code will be automatically generated.

* This method works only in old post editor.

Making the code highlight
After making the code postable, you have to highlight the code in your post for clear view. To do this here is a hack :

To add this go to > Layout >  Edit HTML and search for ]]></b:skin> and add the below code before this tag.
.code {
margin : 15px 15px 15px 25px;
padding : 10px;
clear : both;
list-style-type : none;
background : #f2f2f2;
border : 2px solid #dcdcdc;
}
.code li {
font-size : 14px;
line-height : 20px;
font-family : Arial;
color : #333333;
font-weight : normal;
margin : 0;
padding : 0;
}
You can customize this code and can change colors to match your template.

Now whenever you create a new post include the code between :
<div class="code">
Insert your code [CSS, XML, HTML and Javascript] here.
</div>
This is the best way to add codes in your blog posts. If you find any difficulty just add comments.

Related Posts with thumbnails for blogger

Saturday, December 19, 2009


Simple related posts gadget is replaced by this new 'Related Posts with thumnails'. It has a feature of  displaying the thumbnails of images from the posts and attracts the users which results in increase of page views per user. This gadget is created by BloggerPlugins and is listed here.

Similar gadget is also available  from Linkwithin and is very simple to install in your blog. Finally, this gadget helps in retrieving all your stories from Blog Archieve.

To add this gadget to your blog go to > Layout > Edit HTML and search for </head> and add the below code above this tag.
<!--Related Posts with thumbnails Scripts and Styles Start-->
<b:if cond='data:blog.pageType == &quot;item&quot;'>
<style type="text/css">
#related-posts {
float:center;
text-transform:none;
height:100%;
min-height:100%;
padding-top:5px;
padding-left:5px;
}
#related-posts h2{
font-size: 1.6em;
font-weight: bold;
color: black;
font-family: Georgia, &#8220;Times New Roman&#8221;, Times, serif;
margin-bottom: 0.75em;
margin-top: 0em;
padding-top: 0em;
}
#related-posts a{
color:black;
}
#related-posts a:hover{
color:black;
}
#related-posts  a:hover {
background-color:#d4eaf2;
}
</style>
<script src='http://blogergadgets.googlecode.com/files/relatedthumbs21.js' type='text/javascript'/>
</b:if>

<!--Related Posts with thumbnails Scripts and Styles End-->
Now search for <div class='post-footer-line post-footer-line-1'> and add the below code after this tag.
<!-- Related Posts with Thumbnails Code Start-->
<b:if cond='data:blog.pageType == &quot;item&quot;'>
<div id='related-posts'>
<b:loop values='data:post.labels' var='label'>
<b:if cond='data:label.isLast != &quot;true&quot;'>
</b:if>
<b:if cond='data:blog.pageType == &quot;item&quot;'>
<script expr:src='&quot;/feeds/posts/default/-/&quot;   data:label.name   &quot;?alt=json-in-script&amp;callback=related_results_labels_thumbs&amp;max-results=6&quot;' type='text/javascript'/></b:if></b:loop>
<script type='text/javascript'>
var currentposturl=&quot;<data:post.url/>&quot;;
var maxresults=5;
var relatedpoststitle="Related Posts";removeRelatedDuplicates_thumbs();
printRelatedLabels_thumbs();
</script>
</div><div style='clear:both'/>
</b:if>
<!-- Related Posts with Thumbnails Code End-->
Maximum number of posts displayed can be changed by changing the value in
  • var maxresults=5;
Title of the related posts can be changed from
  • var relatedpoststitle="Related Posts";
Find difficulty in adding the gadget to your blog ? Please post comments.

Recent Posts with thumbnails gadget

Saturday, December 19, 2009


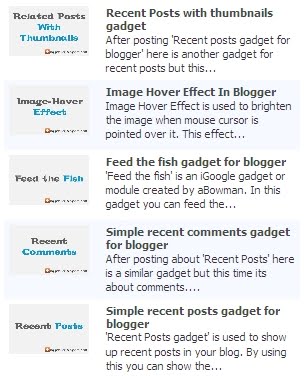
After posting 'Recent posts gadget for blogger' here is another gadget for recent posts but this time to show up thumbnails in the post along with the post titles. This gadget is actually by BloggerTricks designed for a template and can be used for your blog too.

Here is the screenshot of the gadget :


To add this gadget go to > Layout > Add a Gadget > HTML/Javascript and add the below code.
<script language="JavaScript">
imgr = new Array();
imgr[0] = "http://i48.tinypic.com/mwz9ec.jpg";
imgr[1] = "http://i48.tinypic.com/mwz9ec.jpg";
imgr[2] = "http://i48.tinypic.com/mwz9ec.jpg";
imgr[3] = "http://i48.tinypic.com/mwz9ec.jpg";
imgr[4] = "http://i48.tinypic.com/mwz9ec.jpg";
showRandomImg = true;
boxwidth = 298;
cellspacing = 8;
borderColor = "#ffffff";
bgTD = "#000000";
thumbwidth = 40;
thumbheight = 40;
fntsize = 12;
acolor = "#666";
aBold = false;
icon = " ";
text = "Comments";
showPostDate = false;
summaryPost = 100;
summaryFontsize = 10;
summaryColor = "#000";
icon2 = " ";
numposts = 6;
home_page = "http://bloggerflick.blogspot.com/";
</script>

<script src="http://h1.ripway.com/BloggerFlick/Scripts/RecentpostsThumbnails.js" type="text/javascript"></script>
Replace the code in red with your blog URL.
  • boxwidth > Width of the widget
  • cellspacing > Space between cells (default one is good)
  • borderColor > Border color
  • thumbwidth > Width of the thumbnail
  • thumbheight > Height of the thumbnail
  • fntsize > Font size of the title
  • acolor > Color of the title
  • aBold > you want bold titles? [true or false]
  • numposts > How many posts you want to show ?
  • home_page > http://YOURBLOG.blogspot.com/
Everything in the code can be customizable and you can change any value based on your requirement.

Join mybloglog community for more hacks : BloggerFlick On MyBlogLog

Image Hover Effect In Blogger

Friday, December 18, 2009


Image Hover Effect is used to brighten the image when mouse cursor is pointed over it. This effect is being used in many blogs and sites. Its very easy to use this effect in your blog and can be done by using a CSS code in your template.

Here is the demo of this hack :


Actual Image

Effect Added


To add this Image Hover Effect go to > Layout > Edit HTML and search for </head> and add the below code above this tag.
<style type="text/css">

a.linkopacity img {
filter:alpha(opacity=50);
-moz-opacity: 0.5;
opacity: 0.5;
-khtml-opacity: 0.5;}

a.linkopacity:hover img {
filter:alpha(opacity=100);
-moz-opacity: 1.0;
opacity: 1.0;
-khtml-opacity: 1.0; }

</style>
After adding code, have a glance at the below trick :
Actual Code

<a href="https://blogger.googleusercontent.com/img/b/R29vZ2xl/AVvXsEghShQDpFb8eTFL0_AcoBaVW0N_Hrc21iYLV7Y3Pp5euwCXcP4jCkNJ3krBxqh-58Bs8300wVukWitDNjWuUHfb0LT41DgMyxjYF1NgdJnfJk_0QRXPihpiFyzsY1uRelWw3C2y_QwuP2o/s1600/ImageHover.jpg">
<img border="0" src="https://blogger.googleusercontent.com/img/b/R29vZ2xl/AVvXsEghShQDpFb8eTFL0_AcoBaVW0N_Hrc21iYLV7Y3Pp5euwCXcP4jCkNJ3krBxqh-58Bs8300wVukWitDNjWuUHfb0LT41DgMyxjYF1NgdJnfJk_0QRXPihpiFyzsY1uRelWw3C2y_QwuP2o/s320/ImageHover.jpg" /></a>

Changed Code

<a class="linkopacity" href="https://blogger.googleusercontent.com/img/b/R29vZ2xl/AVvXsEghShQDpFb8eTFL0_AcoBaVW0N_Hrc21iYLV7Y3Pp5euwCXcP4jCkNJ3krBxqh-58Bs8300wVukWitDNjWuUHfb0LT41DgMyxjYF1NgdJnfJk_0QRXPihpiFyzsY1uRelWw3C2y_QwuP2o/s1600/ImageHover.jpg">
<img border="0" src="https://blogger.googleusercontent.com/img/b/R29vZ2xl/AVvXsEghShQDpFb8eTFL0_AcoBaVW0N_Hrc21iYLV7Y3Pp5euwCXcP4jCkNJ3krBxqh-58Bs8300wVukWitDNjWuUHfb0LT41DgMyxjYF1NgdJnfJk_0QRXPihpiFyzsY1uRelWw3C2y_QwuP2o/s320/ImageHover.jpg" /></a>

Add  class="linkopacity" tag to the original code, after uploading the image.

To add 'Facebook Share' button with sharecount

Friday, December 18, 2009


After the launch of Retweet button from Tweetmeme, FBshare had launched a facebook sharecount button. By adding this button to your posts, your users can share the content on their facebook profile. The sharecount button for Facebook displays the number of times the current page has been shared on Facebook and allows visitors to share it themselves.

Features :
  • Displays the number of shares [displays Facebook logo when 0 shares].
  • Large or Compact button
  • Track the shares from the button using your awe.sm API Key or fbshare.me links
  • Add Google Analytics parameters to fbshare.me links
  • Configure the colors of the badge in the large button
You can add this in two modes :
  • Large Size Button
  • Compact Size Button
Large Size Button


Sign in to your blogger blog and go to Dashboard > Layout > Edit HTML and click on Expand Widget Templates.
Now find <div class='post-header-line-1'> tag and paste the below code after this tag :
<script src="http://widgets.fbshare.me/files/fbshare.js"></script>
If you dont find <div class='post-header-line-1'> then search for <data:post.body/> and paste the above code below this tag.

Save your template.

Compact Size Button


Sign in to your blogger blog and go to Dashboard > Layout > Edit HTML and click on Expand Widget Templates.
Now find <div class='post-header-line-1'> tag and paste the below code after this tag :
<script>var fbShare = {
size: 'small'
}</script>
<script src='http://widgets.fbshare.me/files/fbshare.js'/>
If you dont find <div class='post-header-line-1'> then search for <data:post.body/> and paste the above code below this tag.

Save your template.

You can add this button to any part of the post. If you face any problems please do add comments.
For more installation options visit FBshare.me .

To add 'Retweet Button' to blogger posts

Friday, December 18, 2009


Twitter is becoming popular day by day. It helps a lot in deriving traffic to your blog. If you use twitter in proper way, you can double your blog traffic. So why not add a retweet button on your posts ? Retweet button let your visitors easily retweet your content on twitter.

Tweetmeme
is a service that help you integrate retweet button to your posts. If you want to add it to your posts, just follow these steps.

You can add this in two modes :
  • Large Size Button
  • Compact Size Button

Large Size Button


Sign in to your blogger blog and go to Dashboard > Layout > Edit HTML and click on Expand Widget Templates.

Now find <div class='post-header-line-1'> tag and paste the below code after this tag :
<script type=%u201Dtext/javascript%u201D>
tweetmeme_url = %u2018<data:post.url/>%u2019;
</script><script type=%u201Dtext/javascript%u201D src=%u201Dhttp://tweetmeme.com/i/scripts/button.js%u201D> </script>
If you dont find <div class='post-header-line-1'> then search for <data:post.body/> and paste the above code below this tag.

Save your template.

Compact Size Button


Sign in to your blogger blog and go to Dashboard > Layout > Edit HTML and click on Expand Widget Templates.

Now find <div class='post-header-line-1'> tag and paste the below code after this tag :
<script type=%u201Dtext/javascript%u201D>
tweetmeme_style = %u2018compact%u2019;
tweetmeme_url = %u2018<data:post.url/>%u2019;
</script><script type=%u201Dtext/javascript%u201D src=%u201Dhttp://tweetmeme.com/i/scripts/button.js%u201D></script>
If you dont find <div class='post-header-line-1'> then search for <data:post.body/> and paste the above code below this tag.

Save your template.

You can add this button to any part of the post. If you face any problems please do add comments.

To add 'Orkut Share' button to every post [Java Script]

Thursday, December 17, 2009


Orkut has recently released orkut Share API for its users. Orkut users can now share and promote interesting content from the Internet with their orkut friends easily with just few clicks. The shared content will appear in their activity updates.

Most of the bloggers and webmasters use Facebook share option to share and promote their content on Facebook. Its one of the best methods to promote their content. It seems Orkut is following Facebook in looks and in features too.

Add Orkut Share Button to blogger posts :

To add this button go to Layout > Edit HTML and click on Expand Widget templates, copy and paste the following code above </head>
<!--orkut share starts here-->
<script src='http://www.google.com/jsapi' type='text/javascript'/>
<script type='text/javascript'>
google.load(&#39;orkut.share&#39;, &#39;1&#39;);
google.setOnLoadCallback(function() {
var params = {};
params[google.orkut.share.Field.TITLE] = &#39;<data:blog.pageName/>&#39;;
params[google.orkut.share.Field.DESTINATION_URL] = &#39;<data:blog.url/>&#39;;
var connection = new google.orkut.share.Connection(params);
document.getElementById(&#39;orkut-share&#39;).onclick =
function(e) { connection.send(&#39;orkut.com&#39;, {}); };
}, true);
</script>
<!--orkut share end-->
Now search for the <div class='post-header-line-1'> tag in your template and add the below code after this tag :
<b:if cond='data:blog.pageType == "item"'>
<span id="orkut-share" style="cursor:pointer; border:1px solid black">
<img src="http://code.google.com/apis/orkut/docs/images/share.gif"/>
</span>
</b:if>
If you dont find <div class='post-header-line-1'> then search for <data:post.body/> and paste the above code below this tag.

That’s all. Save your template and see the changes. If you face any problems please do add comments.

To add 'Subscribe to feed' above comment form

Wednesday, December 16, 2009


Blog feed can be published through Feed Burner and anyone can subscribe to that feed for free. More the number of subscriptions more the traffic. To make this feature available for users link back to the feed can be added above comment form below each post.

To add this widget search for this tag :

<div class='comments' id='comments'>
<a name='comments'/>

Now add the below code after this tag :
<b:if cond='data:blog.pageType == &quot;item&quot;'>
<div style='padding-right:15px;'>
<h2>Subscribe to our blog</h2>
</div>
</b:if>
<b:if cond='data:blog.pageType == &quot;item&quot;'>
<div style='background: #E3EDF1; border: 0px solid #ddd; padding: 5px; margin: 10px; margin-right:15px; height:65px; '>
<table border='0' cellpadding='0' cellspacing='0'>
<tbody><tr>
<td>
<div style='margin-left:10px'>
<img height='55' src='http://i25.tinypic.com/mt5mzb.jpg' width='55'/></div></td>

<td>
<div style='margin-left:15px'>
<div style='font-size:16px; font:Trebuchet MS;'>
Do you have any <strong>Suggestions</strong>, add your comment. Please don&#39;t <strong>Spam!</strong>
<br/>If you like this site &gt;&gt; <a href='http://feeds.feedburner.com/BloggerFlick' target='_blank'><strong>Subscribe to our feed</strong></a></div></div>

</td>
</tr>
</tbody>
</table>
</div>
</b:if>
Replace the link in red with your feed link. You can also add this below each post if the above hack is not working.


Below each post in blogger
To add below each post search for  <data:post.body/>  and add the below code after this tag.

<b:if cond='data:blog.pageType == &quot;item&quot;'>
<div style='padding-right:15px;'>
<h2>Subscribe to our blog</h2>
</div>
</b:if>
<b:if cond='data:blog.pageType == &quot;item&quot;'>
<div style='background: #E3EDF1; border: 0px solid #ddd; padding: 5px; margin: 10px; margin-right:15px; height:65px; '>
<table border='0' cellpadding='0' cellspacing='0'>
<tbody><tr>
<td>
<div style='margin-left:10px'>
<img height='55' src='http://i25.tinypic.com/mt5mzb.jpg' width='55'/></div></td>

<td>
<div style='margin-left:15px'>
<div style='font-size:16px; font:Trebuchet MS;'>
Do you have any <strong>Suggestions</strong>, add your comment. Please don&#39;t <strong>Spam!</strong>
<br/>If you like this site &gt;&gt; <a href='http://feeds.feedburner.com/BloggerFlick' target='_blank'><strong>Subscribe to our feed</strong></a></div></div>

</td>
</tr>
</tbody>
</table>
</div>
</b:if>
Replace the link in red with your feed link. You can also change the image, background color etc directly for this widget.

Simple related posts widget for blogger

Wednesday, December 16, 2009


After adding social bookmark icons below your posts the next importance goes to related posts in which the posts related to the label are published below each post. This is also called 'Similar Posts' widget for blogger. By adding this you can make the user stay on your blog. Any number of posts can be shown from the related labels.


To add this for your blog, search for  ]]></b:skin>   by pressing Ctrl + F and add the below code before this tag.
#related {
font:Arial;
font-size:14px;
font-weight:bold;
line-height:18px;
}
#related ul {
list-style-type:none;
margin-left:15px;
padding:0;
}
#related li a:link, #related li a:visited, #related li a:active {
-moz-background-clip:border !important;
-moz-background-inline-policy:continuous !important;
-moz-background-origin:padding !important;
background:#fff none repeat scroll 0 0 !important;
border-color:#f2f2f2;
border-style:solid;
border-width:1px 2px 1px 27px;
display:block;
padding:5px 0 5px 10px;
}
#related li a:hover {
border-color:#909090;
border-style:solid;
border-width:1px 2px 1px 27px;
display:block;
padding:5px 0 5px 10px;
text-decoration:none;
}
This code can be modified to fit the colors of your blog.

You have to add a script to make this widget work, to add script search for  </head>  and add below code before this tag.
<script type='text/javascript'>
//<![CDATA[
var relatedTitles = new Array();
var relatedTitlesNum = 0;
var relatedUrls = new Array();
function related_results_labels(json) {
for (var i = 0; i < json.feed.entry.length; i  ) {
var entry = json.feed.entry[i];
relatedTitles[relatedTitlesNum] = entry.title.$t;
for (var k = 0; k < entry.link.length; k  ) {
if (entry.link[k].rel == 'alternate') {
relatedUrls[relatedTitlesNum] = entry.link[k].href;
relatedTitlesNum  ;
break;
}
}
}
}
function removeRelatedDuplicates() {
var tmp = new Array(0);
var tmp2 = new Array(0);
for(var i = 0; i < relatedUrls.length; i  ) {
if(!contains(tmp, relatedUrls[i])) {
tmp.length  = 1;
tmp[tmp.length - 1] = relatedUrls[i];
tmp2.length  = 1;
tmp2[tmp2.length - 1] = relatedTitles[i];
}
}
relatedTitles = tmp2;
relatedUrls = tmp;
}
function contains(a, e) {
for(var j = 0; j < a.length; j  ) if (a[j]==e) return true;
return false;
}
function printRelatedLabels() {
var r = Math.floor((relatedTitles.length - 1) * Math.random());
var i = 0;
document.write('<ul>');
while (i < relatedTitles.length && i < 20) {
document.write('<li><a href="'   relatedUrls[r]   '">'   relatedTitles[r]   '</a></li>');
if (r < relatedTitles.length - 1) {
r  ;
} else {
r = 0;
}
i  ;
}
document.write('</ul>');
}
//]]>
</script>

 Now search for  <data:post.body/>   and add the below code after this tag.
<b:if cond='data:blog.pageType == &quot;item&quot;'>
<div id='related'>
<h2>Related Posts</h2>
<b:loop values='data:post.labels' var='label'>
<b:if cond='data:blog.pageType == &quot;item&quot;'>
<script expr:src='&quot;/feeds/posts/default/-/&quot;   data:label.name   &quot;?alt=json-in-script&amp;callback=related_results_labels&amp;max-results=5&quot;' type='text/javascript'/></b:if></b:loop>
<script type='text/javascript'> removeRelatedDuplicates(); printRelatedLabels();
</script>
</div>
</b:if>
This will work for sure and to change number of posts to be displayed change max-results=5 to your required value.

To change size of image in blogger after uploading

Monday, December 14, 2009
Any image uploaded to blogger will be automatically hosted at Picasa Web Albums and is resized  as :


The original image uploaded will be shown only after clicking on this resized image. There are different modes like S1600, S800, S400 and S320 in which the image is automatically generated and resized. Different sizes are :

S1600


S800


S400


S320


If you want to use the original image uploaded instead of resized one, you can do that using this hack. After uploading image click on  Edit HTML  and you will find code like this :
<a href="https://blogger.googleusercontent.com/img/b/R29vZ2xl/AVvXsEhC1f2WUFLq_LtWw5X0uF1q0n2dTQdbeVre0OfJIyJcmgcFSKcSUFsRrDzXJT_DMSC5qw8FYzrpNg6wklHepLyo5r0wMIbGLRlg3eLcR4NDUrsp6dNeXaW22km7La3Jrj3UeubHfM44QRA/s1600-h/bflick.jpg" imageanchor="1" style="margin-left: 1em; margin-right: 1em;"><img src="https://blogger.googleusercontent.com/img/b/R29vZ2xl/AVvXsEhC1f2WUFLq_LtWw5X0uF1q0n2dTQdbeVre0OfJIyJcmgcFSKcSUFsRrDzXJT_DMSC5qw8FYzrpNg6wklHepLyo5r0wMIbGLRlg3eLcR4NDUrsp6dNeXaW22km7La3Jrj3UeubHfM44QRA/s320/bflick.jpg" border="0" /></a>
Change the value in red to s1600. You can also change it to s800 or s400 also.

How to swap blog title with the post title

Monday, December 14, 2009


Generally, blog title will be displayed for every post on blogger. By using a hack we can change or swap the blog title with post title. This makes your posts SEO [Search Engine Optimisation] friendly.

You can also keep your blog title along with the post title. When you click on any post then post title will be displayed followed by blog title.

Its easy to make this post-tile hack. Just go to > Layout >Edit HTML  and search for this tag -  <title><data:blog.pagetitle/></title>  Replace this tag with below codes :

Post Title followed by blog title
<b:if cond='data:blog.pageName == &quot;&quot;'>
<title><data:blog.title/></title>
<b:else/>
<title><data:blog.pageName/> | <data:blog.title/></title>
</b:if>
Only post title without blog title
<b:if cond='data:blog.pageType == &quot;index&quot;'>
<title><data:blog.title/></title>
<b:else/>
<title><data:blog.pageName/></title>
</b:if>

Check how to add favicon also !

How to add favicon to blogger

Monday, December 14, 2009
Favicon, or Favourate Icon is the little icon that appears before the web address. When you visit the sites or bookmark them, these icons will make those URLs stand out. Check out your Bookmarks. It will be clear from the picture below :


You can add favicon for your blog by choosing an image of smaller size in  .ico, .gif, .jpeg or .png    formats. After choosing the image upload it to any imgag hosting service you use like photobucket, tinypic or imageshack.After uploading take the url of the image where it's hosted.

Now Browse to Layout > Edit/Html > Press Ctrl+F  and Search For <head> and paste the below code after this tag :
<link rel="shotcut icon" href="url of your icon">
Replace url of your icon with url of your image.

Recommended Favicons :

http://www.smashingmagazine.com/tag/favicons/
http://mppierce66.home.comcast.net/~mppierce66/web/fi/index.htm
http://www.deltatangobravo.com/archive/2004/march/favourite